SPECIFICATION GENERATOR
Find out which low impact materials are right for your building project.
How to insulate a pitched roof using wood fibre insulation
Here, using some simple 3d models, we look at how to insulate your pitched roof. We start with installation from the exterior, which is our recommendation if possible, and move on to installation from the interior below.
This guide is for slated/tiled roofs with a pitch of more than 20 degrees or metal sheet/standing seam roofs with a pitch of over 10 degrees. If you have a flat roof construction, please look at our flat roof installation guide or contact us for more details.
To find out exactly what materials are required for this process, if you don’t already, please visit our Specification Generator. This tool will give you a full specification based on the U-value and rafter size requirements you have. If you’re still not sure, please contact us for more information.
External application of wood fibre boards
So, on to the installation. We’ll start with fixing the boards externally as this is by far the easiest and most effective way to create an insulated roof structure with wood fibre. It gives the best overheating protection and thermal bridge protection and so creates the most comfortable internal spaces. If you want to install the boards to the underside of the rafters click here.
Step One
(Click play to activate the model, click the numbers for the annotations, full screen icon bottom right.)
Whether this is a new roof or an existing roof, the first step is to fix a 9mm OSB board to the underside of the rafters to support the insulation. It is tempting to assume that the initial friction fit of the batts is enough to hold it but wind and rain will cause them to drop out during construction and over time they can slowly drop from between rafters and rest on the airtightness membrane, causing gaps to open up.
The OSB does not need taping at this point, even if it is going to be the airtightness layer.
If you’re adding insulation over the outside of an existing ceiling and you have no access to the interior then you will need to install the Ampatex Solero weather resistant VCL membrane as per the below example. Start by running Ampacoll DT double sided tape down the sides of the rafters, as close to the existing ceiling as possible. Rows of membrane are then laid carefully up and down between the rafters and pressed firmly against the Ampacoll DT tape strips.
Once the membrane has been installed, tape all the joints with the Ampacoll Flexx Pro tape to ensure airtightness.
(Click play to activate the model, click the numbers for the annotations, full screen icon bottom right.)
Step 2
With the OSB in place and starting at the bottom, install the SteicoFlex 036 flexible wood fibre insulation by simply pressing in between the rafters. It comes in 375 and 575mm widths but if you need to cut it for width or length then cut 10-15mm wider than the cavity so that when you press it in it forms a very snug fit. Ensure that the batts reach all the way to the outside of the wall plate at least.
The SteicoFlex must be at least the depth of the rafters, if not slightly more so that there are no voids between it and the boards that are laid over the top. Gaps between insulation layers (any insulation) can reduce the insulation performance by 50% or more so it is very important to ensure that are none.
If required, increase the height of the ridge board to pick up any ridge tile systems that will be used on the project.
Step 3
The next step is to install the wood fibre boards over the rafters. Set up a string line at the appropriate height along the bottom of the rafters (approx. 550mm up from the end of the rafters) and lay the first row of boards, which should be slightly overhanging eaves and the ends of the rafters so that they can be plumb-cut to produce a flat face. Use 1 or 2 fixings per board to hold these boards in place temporarily until the rest of the boards are installed.
The boards are installed in rows, with the tongue pointing up the roof in a landscape orientation in a brick-bond type pattern. Usually, what is cut off of the end of one row is used to start the next row, so long as it is more than 1 rafter spacing in width and all vertical joints should be at least 1 rafter spacing. However, the boards do not need to join on rafters as they are T&G on all 4 sides, enabling the joints to be anywhere between rafters.
The top row of boards on one side can be cut to form a mitred joint at the ridge or a lap joint, which ever is easier, so long as there are no gaps between the boards. The offcuts can then be used to start the bottom row on the second side of the roof so that the amount of waste is minimal.
As the boards are installed it is useful to mark on the top face of the boards where the rafters are so that the counter-battens can be confidently installed after the boards are laid.
Step 4
Firstly, fit the fascias and then the eaves trays, making sure that the eaves trays fall towards the gutters. The trays should be taped to the surface of the roof using the Ampacoll Fenax 40/60 membrane edging tape
On to clean, dry boards, firmly apply strips of Ampacoll DT double sided tape to the top of the boards at roughly 1 metre centres, or closer if it is windy. Next, lay the Ampatop Aero breathable roofing membrane in wrinkle free rows on to the surface of the boards and firmly press down on to the double sided tape, making sure the membrane reaches the ends of the rafter trays. This tape is a temporary mounting aid, not a permanent fixing so apply the membrane, tape and counter-battens as soon as possible after.
Ensure there is a minimum overlap of 100mm between each row and seal all of the horizontal and vertical joins with Ampacoll Flexx Pro external air tightness tape. Rafter positions should be transferred from the wood fibre boards to the surface of the breathable membrane to enable confident installation of the counter-battens. This can be done simply with a builder’s pencil or permanent marker.
Once the membrane is complete install the counter-battens on to the surface of the roof. For wood fibre boards up to 80mm thickness, use fixings at 300mm centres up the counter-battens with the screws running straight down (perpendicular) in to the rafters with at least 40mm penetration into the rafter.
For wood fibre boards of 100mm and more, fix the counter-battens in the same way as above at each end and in the middle. The rest of the screws will need to be longer and should be put in at alternate 45 degree angles to increase the resistance of the battens to sliding down the roof (sheer resistance). Depending on the size, these can be put in at 4-500mm centres but if the roof covering is very heavy an engineer should be consulted on the correct size and number of fixings.
The counter-battens should be pulled firmly against the surface of the roof, such that the battens lay flat but tight against the membrane so that rain cannot penetrate under them. If you look up the length of the counter-battens and they are rising and falling they are too tight against the surface. If rain is likely to penetrate the roof covering regularly, such as using tiles or slates on a low pitched roof or in a very exposed area, use the Ampacoll ND Duo nail sealing tape on the back of the battens before installing to prevent moisture from penetrating behind battens, through the breathable membrane.
Step 5
Once the counter-battens have been fitted progress on to fitting the battens, slates/tiles and the ridge tiles so that the exterior is weather tight.
On the inside, once any moisture has dried, the Ampatex Sinco airtightness and vapour control membrane can be applied to the interior surface of the OSB.
Apply strips of Ampacoll DT double sided tape to the surface of the OSB and bond the membrane, free of creases, to the surface. Each row of membrane should overlap the adjacent rows by a minimum of 100mm and all joints should be taped with the Ampacoll INT airtightness tape. The perimeter of the membrane should be sealed against any masonry walling with the Ampacoll Fenax 40/60 membrane edging tape.
Once installed, fix the counter-battens using screws or nails. Should the fixing be in the wrong place, do not remove it and instead, add another in the correct place. The reason for this is that the fixings puncture the membrane and removing fixings creates holes in the membrane which allow air and moisture leakage into the roof structure. Once complete any electrical services can be fixed to the sides of the counter-battens in conduit.
If you are adding SteicoFlex 036 flexible wood fibre insulation between the counter-battens, we suggest you press it in between the counter-battens and then use strips of plasterboard scrim tape, stapled to the underside and spanning between the counter-battens, to hold in place until such time as the plasterboard is fitted. At 25mm or 40mm the insulation is much more floppy than the thicker slabs and so is more difficult to keep in place.
The plasterboard can then be fitted, skimmed and the work completed.
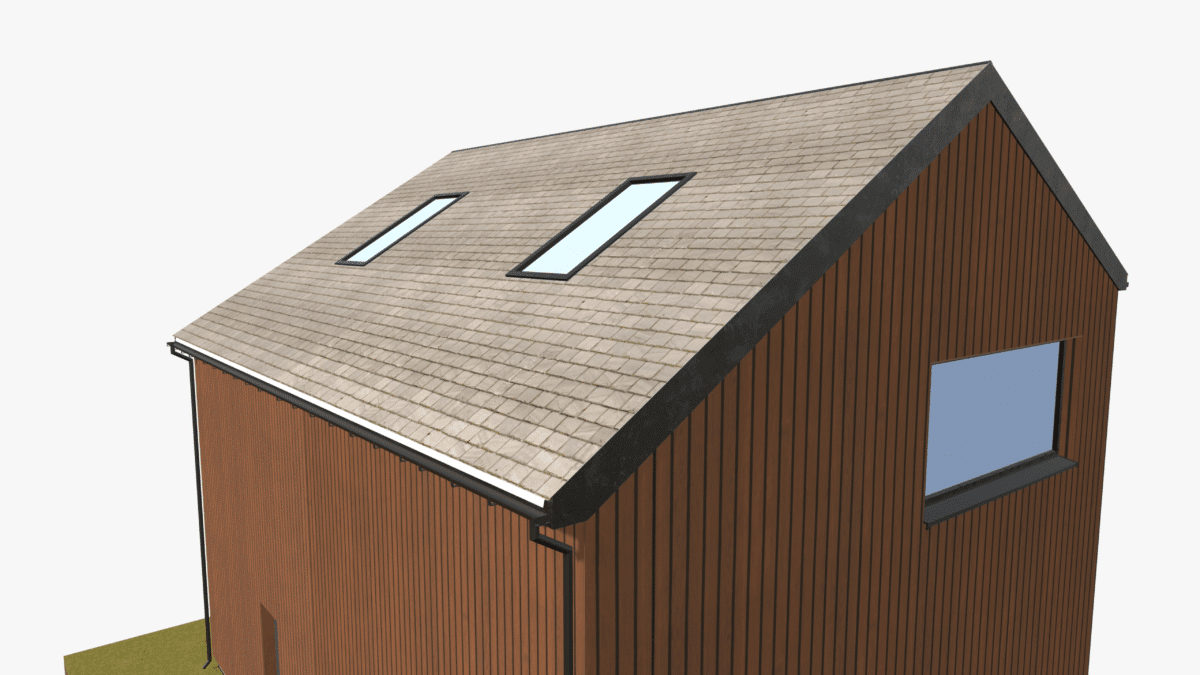
How are roof lights fitted?
(Click play to activate the model, click the numbers for the annotations, full screen icon bottom right.)
The process is largely the same for roof lights but changes after the membrane has been laid and taped over the boards. The opening should be framed out first with battens/counter-battens and the window mounted on to the battens. Using the Ampacoll Fenax 40/60 membrane edging tape seal from the surface of the membrane, up over the battens and fixing brackets, and on to the frame of the roof light.
Once this has been completed, the rest of the counter-battens can be installed but make sure they leave a minimum 25mm gap around the perimeter of the roof light so that any water can drain around the window rather than puddle.
Internally, cut the Ampatex Sinco airtightness and vapour control membrane such that the membrane fold into the opening and reaches the inside of the frame. Cut additional section to cover the missing pieces and tape into place. Once the entire perimeter of the opening has been formed with membrane, bond the membrane to the underside of the window with the Ampacoll XT double slit tape, which is designed to have 12mm of tape sticking to the window frame and the other 48mm sticking to the membrane.
Next, frame out the opening with counter-battens as per the outside and the plasterboard can then be screwed into place. Again, if during the installation of the plasterboard you place a screw in the wrong place, do not remove it, just add another to prevent open holes being left in the airtightness membrane.
How are dormer windows constructed?
(Click play to activate the model, click the numbers for the annotations, full screen icon bottom right.)
Generally, the wood fibre sarking boards would be installed on to the surface of the pitched roof, followed by those on the studs walls of the dormer, followed by those on the roof of the dormer. Dormers are usually built with a flat roof, which needs to meet the U-values for any other flat roof.
If you have any questions about this installation, please feel free to contact us.
Under rafter installation
When installing the wood fibre boards to the underside of the rafters it is important to check whether there is a breathable membrane on the outside of the roof and whether there are counter-battens over the breathable membrane. This is obviously straight forward on a new roof but for an existing roof, as the model above, it needs consideration.
Counter-battens lift the battens off of the surface of the roof and allow drainage and air movement over the surface of the membrane, preventing puddling and reducing the risk of batten decay and water penetration through the punctures in the membrane. If there are no counter-battens with the breathable membrane you will need to leave a gap of 10-15mm under the battens (e.g. the insulation is 10-15mm thinner than the depth of the rafters) to allow drainage to occur.
If the roof is covered with an impermeable membrane then you should install eaves and ridge ventilation between every pair of rafters to ensure air flow between the insulation and the membrane. This would apply to any insulation and is not specific to wood fibre insulation.
The SteicoFlex flexible wood fibre insulation should be fitted between the rafters and finished flush with the base of the rafters. If it has been pushed too far up between the rafters then pull it back down flush with the bottom of the rafter by slotting a bucket trowel or similar flat blade between the flex and the rafter, pressing against the flex and gently pulling downwards.
Application of the first layer of boards
Usually, using this method, there are two layers of wood fibre boards to be added under the rafters to achieve the required U-value. If this is the case, the boards should be scribed to the adjacent surfaces so that there are no air gaps between them and the adjacent surface. If large expanses of boards are being fixed, set up a string line along the base first to ensure that the boards are installed neatly, without gaps between them. The boards will only need one or two fixings per board to hold them in place but remember to mark the position of the rafters on the surface of this layer with a marker so that this can be transferred to the second layer of boards, ensuring easy fixing.
The boards should be fixed in a brick pattern and if the roof is flat, do not need to join on a rafter. If the roof surface is uneven the boards will need to join on a rafter to create a smooth surface with no gaps between the layers.
Application of the airtightness and vapour control membrane
Once the first layer of boards are in place and depending on the specification, move on to either installing the VCL membrane (for a direct plastered second board layer) or move on to fixing the second layer of boards. If no membrane is required at this stage move on to the next step.
If installing the the Ampatex Sinco or Ampatex DB90 airtightness and vapour control membranes, using the spreading tool firmly apply strips of the Ampacoll DT to the surface of the boards and gently peel off the paper from the surface of the tape. Apply rows of the membrane and press firmly against the surface of the tape, making sure there are no wrinkles. All laps should be taped with Ampacoll INT airtightness tape and plenty of membrane should be left around the perimeter or around roof lights to enable a good bond to the adjacent surfaces.
Use the Ampacoll Fenax 40/60 membrane edge sealing tape to seal the perimeter of the membrane to the adjacent wall surfaces. Within any roof light openings, cut the membrane as required and insert new sections of membrane to ensure a continuous seal up to the edge of the window.
Please be aware that the Ampacoll DT is a temporary mounting aid and is not a permanent bond. You should move on to the next layer of boards or battens as soon as possible to avoid the membrane peeling off of the surface.
Application of the second layer of boards
Install the second layer of boards, which would usually be T&G profiled boards, in the same way as the first by scribing them to the adjacent surfaces to ensure maximum contact and minimum voids. Again, use a string line to get the first row of boards neatly lined up so that subsequent rows do not have gaps in the joints and install in a brick pattern with at least one rafter spacing between the vertical joints in the boards.
To fix the boards, get them in the correct position and screw in 2-4 fixings (depending on the size of the boards) to keep them in place, marking the rafter positions on the surface from the marks on the boards below.
The boards are installed in rows, with the tongue pointing up the roof in a landscape orientation in a brick-bond type pattern. Usually, what is cut off of the end of one row is used to start the next row, so long as it is more than one rafter spacing in width and all vertical joints should be at least 1 rafter spacing. However, the boards do not need to join on rafters as they are T&G on all 4 sides, enabling the joints to be anywhere between rafters.
The top row of boards on one side can be cut to form a lap joint and the offcuts can then be used to start the bottom row on the second side of the roof so that the amount of waste is minimal. As the boards are installed it is useful to mark on the top face of the boards where the rafters are so that the counter-battens or fixings can be confidently installed after the boards are laid.
If this second layer of boards is to be direct plastered, the rest of the fixings will need to be installed into the boards before plastering. There should be a minimum of 6/m2 but it would usually work out closer to 8/m2 if the timbers are at 400mm centres.
Application of counter-battens
If the specification refers to counter-battens, these should be applied over the airtightness and vapour control membrane. With this in place, screw fix the counter-battens through to the rafters, ensuring at least 40mm penetration into the rafters. The rafters positions should still be visible as the Ampatex Sinco and DB90 membranes used are transparent so the marks on the boards can be seen easily.
Fix the counter-battens with around 3 screws per metre and do not over-tighten the screws as this will cause dips in the battens which will transfer through to the finishing boards.
With the counter-battens fixed as per the above drawings, any wiring can be first-fixed to the sides of the battens. If further SteicoFlex insulation is being used between the counter-battens, this should be pressed in place and held in with strips of plastering scrim tape, stapled to the surface of the battens. This will hold the insulation until you’re ready to install the plasterboard.
If you have any questions about this installation, please feel free to contact us. Return to the Top
Hi , these guides are great , thanks. I have an old 1800 s cottage with an old and new roof! The old roof,pitched roof which we are hoping to insulate has no liner under the tiles at all. The tiles are mounted directly onto sarking boards – it is very draughty but watertight. We are fitting from the inside – should we fit a breathable vapour barrier first to reduce windward, in a pillow like fashion as you would like under a suspended floor ?
We would use buttons and a strip of timber running horizontally so we have something to push the tape against. Is there a membrane that would be suitable for this (under the tiles, on the back of the insulation) and underfloor insulation? Thanks ,greg.
when using 2x80mm sarking board layers is there a recommended fixing sequence of one layer then a second layer?
Hi Chris
Yes, you’d be best to fix the first layer with one or two fixings per board and then lay the second layer over, staggering the joints and again fixing with one or two fixings per board. Each time you add a layer you need to mark the position of the rafters so that over the final layer and membrane you can hold it all firmly in place with the counter battens. Hope that helps.